
When I started with blogger years ago as a newbie, then a time came when I wanted to link the domain I bought from godaddy to the my .blogspot.com. Although, everything then was a bit complicated and not so straight forward then. I will show you in few steps how to do add it.
The benefits of custom domain gives us uniqueness and gives us credibility from users. Other reasons behind adding a custom domain to blogger can be getting AdSense approval, etcetera.
I am going to show you how to link a domain name from Gdaddy to your blog. By now, I'm sure you already bought your domain name. Relax it's easy.
Steps To Adding Linking The Domain Name
- Login to your blogger dashboard.
- Select » Stettings » Basic
- Under Publishing, Click on » + Set up a third-party URL for your blog

The moment you click on save, that error comes up;
We have not been able to verify your authority to this domain. Error 32.What that error simply means is that google needs to verify if you are the owner of that blog. So to complete the process, you need to login on another tab of your browser to your Godaddy account to add A & CNAME records.
5. Login to your Godaddy.com account.
6. At the upper right hand where you have your name written, click it and then click on » My Products.
7. You will see the page just like the image below or similar on to it.
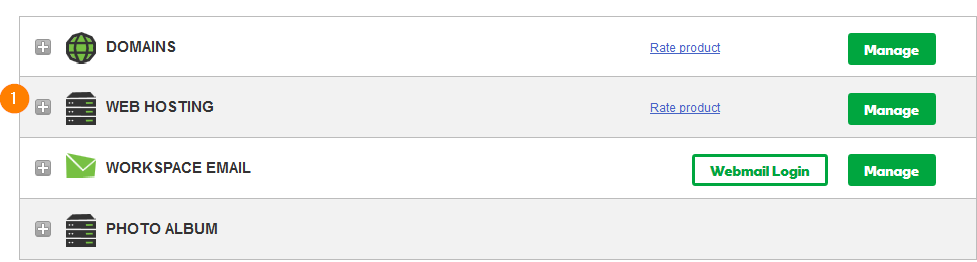
8. There will be a drop down when you click on the little + icon before DOMAINS
9. In the drop-down, locate the domain name you are looking for and hit the → Manage DNS button

10. You will be taken to the DNS page, DNS means domain name server.
Now, from the previous tab, were you were setting up your domain name, you need to copy and paste those records.

Back to that Godaddy tab. Scroll down the page on the Records section until you find Add. Click on Add and
Then this options pops out.
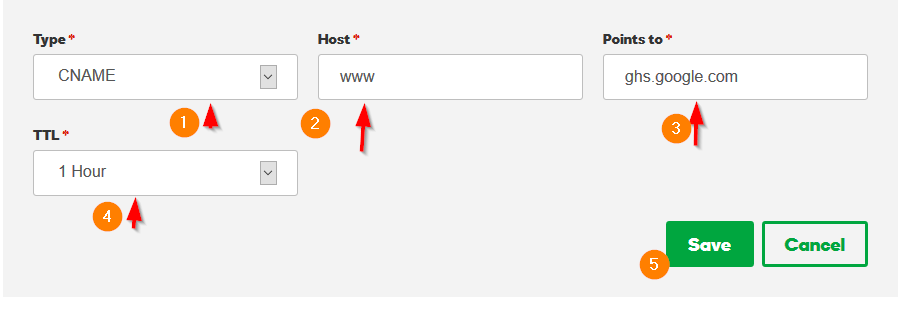
Enter your the records Google gave you at blogger.
www. ghs.google.comEnter the details in the following format as seen in the screenshot.
Under Type, select CNAME
Under Host, enter www
Under Points To, enter ghs.google.com
Under TTL, select 1 hour.
Then save itRepeat the same thing for the second record and save it.
After you have finished adding both records, go back to your blogger dashboard. Then enter your domain name again, and click on save. It will save this time around.
Then make sure to tick the box that says

The reason for ticking that option is because blogger platform, blogs cannot be hosted with a naked domain (yourdomain.com). If a visitors open your domain name with yourdomain.com they will get an error page, that's why you have to redirect it to www.yourdomain.com
After
setting up your domain and you still don't see your website when you
open your domain name in your browser, don't panic. It takes between
an hour to 48 hours to propagate your DNS settings. We can speed up this
process and make yourdomain.com display your website instantly.
This time around, you need to add A records.
Steps of adding A records
Copy the each of the IP addresses and add it to your "A" records in DNS management page on Godaddy.
@ 216.239.32.21
@ 216.239.34.21
@ 216.239.36.21
@ 216.239.38.21
@ 216.239.34.21
@ 216.239.36.21
@ 216.239.38.21
This time around, the Type is A
The @ symbol goes under Host
The IP address goes under Points To

Repeat
the process for every IPs. Go back and enter your domain name into the
address bar of your website, you will see you website comes up
immediately. If it still does not display your website, just wait for a
little while.
Note: Remember that if you find
any other IP address in the A records list, delete it. Only the Google's
IP address I provided above should be in the list.
Good luck on your first domain name. If you still have issues, you can use the comment box below to send me a message.
0 comments:
Post a Comment
Note: only a member of this blog may post a comment.